Getting a water filter for your apartment may not guarantee clean and healthy drinking water permanently, but a regular and timely replacement does. Regular water filter replacement ensures your office, home, and apartments are served with odor-free, healthy water.
Knowing how to change water filters is a necessary skill, especially for supplies that have been previously untreated. Here’s a comprehensive guide that includes the steps you need to take to change your water filter.
Heads up: we’ll be discussing four kinds of water filters. They’re classified based on placement and include:
- Pitcher water filters
- Filters for the whole house
- Refrigerator water filters
- Water filters beneath the sink
Changing a Pitcher Water Filter
Satiating thirst is easy if you have a water pitcher within easy reach. Filtered drinking water from such a nearby jug isn’t only satisfying, but clean and clear.

Water filters for pitchers are usually of modest size, convenient enough to take along while traveling. Moreover, it comes at an affordable price: water filters for pitchers are the cheapest among the four kinds of filters. They’re replaced easily by following the below procedures.
Unpack and Prepare Your New Filter
After purchasing the filter, you need to remove it from its packaging. Then, get the unpacked filter into the water as directed. Water filters are soaked so that the charcoal synthesis can process water effectively when finally inserted into the pitcher.
Remove Old Filter
The majority of pitchers are designed to filter water through a cylindrical filter between a top and a bottom compartment. The filtered water sits on the bottom compartment while the top serves as the entrance to unfiltered water.
Removing the cylindrical filter requires you to first open the lid of the pitcher. You then have to locate and hold on to the filter. Then, to get it out, rotate it around the cylinder, applying an intermittent pulling motion.
Substitute the New Filter
Lift your already soaked filter into the empty cylinder. For those filters that don’t require soaking, in the same manner, lift it into space earlier occupied by the old filter. After getting it in place, you need to rotate it in the opposite direction spun when removing it.
Add water to the pitcher, and voila! You have ready-to-use filtered drinking water.
Some pitchers have indications of when a filter needs replacement. If you monitor it, it’s super convenient.
How to Change Water Filters for the Whole House
Replacing the water filter of an entire building involves the most tedious work among the four popular kinds of water filter replacements available. That’s because it requires more supplies, and the process is technical compared to the others. Nevertheless, the steps below are comprehensive, and if followed carefully, replacing a water filter for the home will be a breeze.
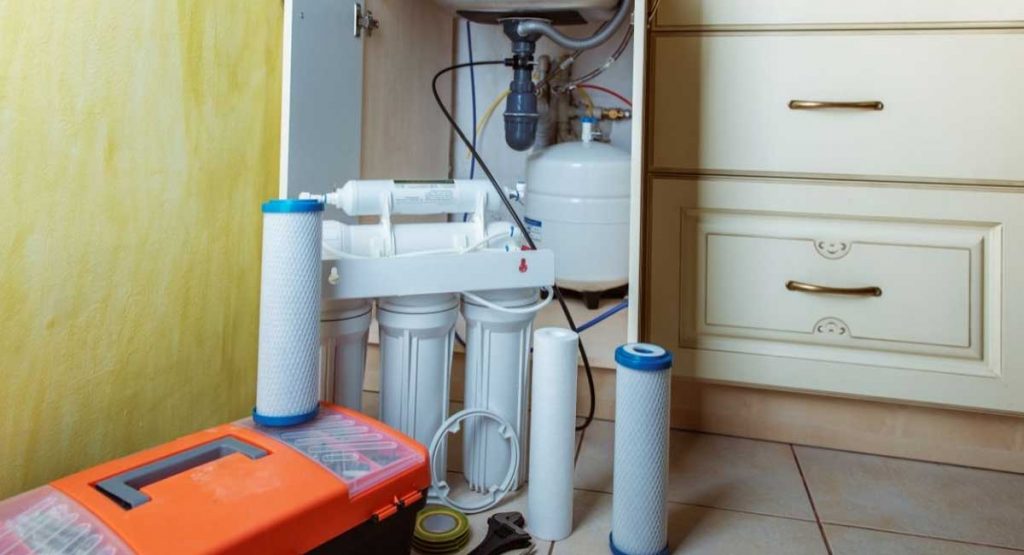
The Recommended Supplies And Tools You Need
The building type determines the kind of supplies and tools to be used. Ensure the exact items needed to replace the filter are available. They are:
A New Filter: The water filter to be used needs to suit the kind of structure to be served by the filtered water. The water type and the filtering setup should also determine the choice of filter.
New O-ring: In addition to a new filter, you need an O-ring replacement. This new ring replaces the old one, even when the old one is still in perfect condition. Be sure to source for an appropriate O-ring to avoid leaks due to incorrect fit.
Filter wrench: A filter wrench is used for holding, twisting, and turning a filter unit during installation. Using one that doesn’t fit the unit makes the twisting impossible.
Plumber’s tape: This is useful during the sealing operation. It prevents leaks and secures likely wear.
Strap wrench: This tool is auxiliary to the Filter wrench, and helps during screwing operations.
Silicon grease: This is used to seal the O-rings. It should be recommended for use with a water filter facility, bearing in mind that this is a facility through which usable water proceeds.
Turn Off Water Supply to the Apartment
The first thing to do before fitting the water filter proper is to switch off the water supply to the apartment. Rather than turn off the entire apartment’s water supply, you can alternatively place a valve near the water filter location. Note, however, that an entire knockout of the water supply is preferable.
Release Pressure in Water System
There’s the likelihood of pressure being trapped behind the pipes delivering water to the apartment. Removing it is easily done by opening one of the taps and sinks in the building. It’s advisable to open taps or sinks within the first floor if it’s a multi-story building.
While installing, the taps should be left open.
Prep the Area Where the Filter Is to Be Located
The water filter has valves controlling the direction of water flow. First, there’s a lever for water getting into the filter. Then, another lever prevents or allows the movement of treated water out of the filter. Finally, the third lever, when put on, allows water to the filter.
This bypass lever is to be turned on during the period of filter prep. Meanwhile, the intake and outtake lever need to be off throughout the water filter preparation.
You might lack the technical understanding to discern which levers are for intake, outtake, and bypass. Furthermore, there are either two or three levers, depending on the setup used. This could be puzzling. And to stay on the safe side, engage the service of a plumber to identify the lines and probably help you in the installation.
Open the Canister
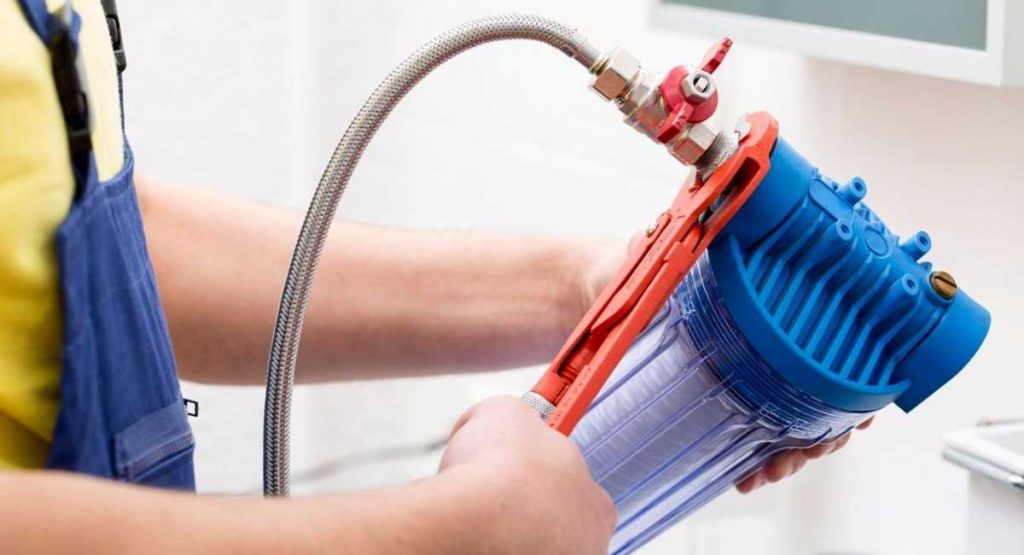
With the water filter wrench, loosen the canister. The best way to do this is by tapping the wrench with a mallet. However, if that doesn’t part the canister due to deposits of calcium, the strap wrench will suffice.
An automatic pressure-relieving unit is provided for some filters, especially the ones that are pricey. A red button is usually available for this, and when pressed, it helps to release the hold of the units, eventually aiding its opening.
Access the Filter
After removing the filter, you need to inspect the condition of the old filter and its housing. This, among other reasons, helps you evaluate the frequency with which it should be replaced.
The kind and position of debris around the filter indicates whether there are problems within the system. Litter is to be found only outside the filter; its presence inside indicates a pipework problem. Additionally, the presence of large debris is strange, and such a condition should be rectified by a trusted technician.
Replace the O-ring
The O-ring is the rubber that lies in between the canister and the filter bracket. Its function is to ensure an airtight wall between the two parts.
The O-ring has to be removed with great care. Start by prying the rubber from the housing. If the O-ring isn’t to be replaced but adjusted, be wary of damaging the housing and the O-ring.
Next, you have to clean the surface with a Q-tip. You use Q-tips rather than other cleaning tools so that your new ring doesn’t get damaged. Apply the silicone grease and prep your new O-ring for installation.
Install the New Filter
It’s always recommended that the filter be initially soaked in clean water to get it prepared for water treatment. Then, take off the filter from the water and place it at the center of the canister. Aligning the filter to the center reduces the risk of damage to the filter’s top. And while installing it, do all you can to keep the filter level in the canister.

Finish the Replacement By Pressurizing the System Once More
If you locked the faucet before working on the water filter, turn it on again. Now, enlist someone to handle the valve controlling water flow from the system. While the valve is slowly being turned on, you should simultaneously switch on the intake lever at the water filter. This allows you to evaluate your finished work.
Changing a Refrigerator Water Filter
Refrigerator filter types are contingent on the make of the refrigerator. You can choose between either a twist-in or push-in kind, so refer to your manual for the one that would suit your refrigerator. For all refrigerator types, here are the procedures to set a water filter:
Turn Off the Faucet
You don’t necessarily need to close the tap bringing in water to the whole building. Instead, locate the faucet that controls the water coming into the refrigerator, and turn that off.
Take Off the Old Filter
Some refrigerator units (push-in) come with an eject button that easily removes the filter when pressed. Others (twist-in) need to be removed manually. Locate the filter at the bottom of the unit, turn to the left, and gently lift it to remove.
Substitute the New Filter in Place of the Old
Fit the filter into the place earlier occupied by the now removed filter. You do this by aligning it with the indicated arrow. After that, rotate it gently to secure it in place. You’ll hear a snap if successful, and the button pressed to eject the old filter should pop out.
For twist-in models, rather than applying a slight torque after aligning the filter into position, you need to turn it round to obtain an appropriate fit.
Turn the water supply back on. However, for units fitted with a filter indicator, refer to the manual and reset it before allowing water back into the unit.
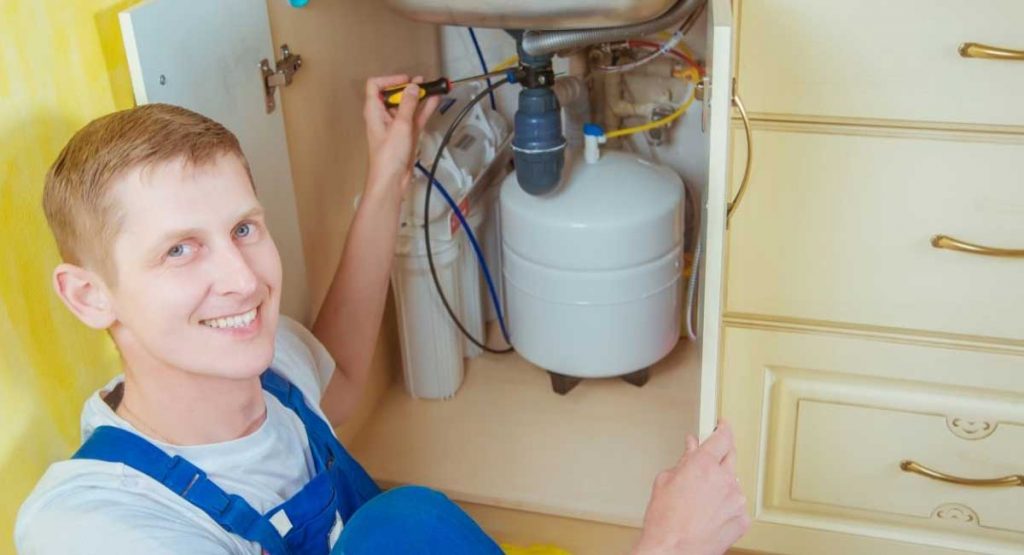
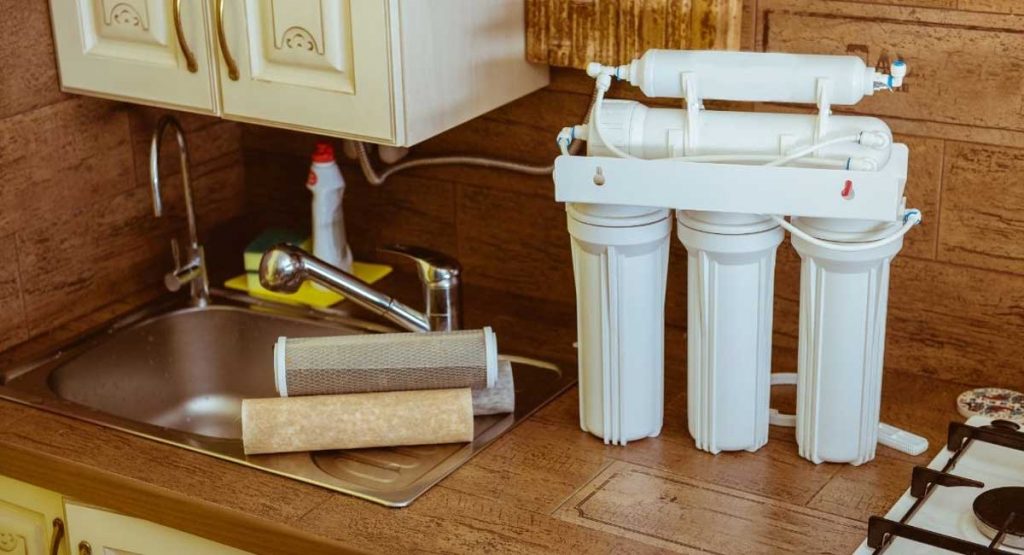
Changing a Water Filter Under the Sink
An under-the-sink water filtering unit ensures the water coming into the kitchen and dining tap is clean. Replacing an effective filter of such a unit is easy and can be done by any careful individual. The steps are as follows:
Switch Off the Water Supply
A valve which controls water to the sink should be turned off. This is usually located below the sink. Then, depressurize the system by switching open the tap.
Take Out the Old Filter
Remove the under-sink filter unit from the wall bracket that holds it. Some models have replaceable filters while others don’t. For the unit that can’t be reused, dispose of it. For the model whose filter could be replaced, dispose the filter only.
Install the New Filter and Re-Pressurize
Clean the interior of the reusable filter unit. Then fit it in according to the manufacturer’s installation directive.
For disposable models, you only need to place them in place on the wall bracket. Then, connect back the input and output hoses to their rightful place.
Now, slowly turn the valve controlling the water source back on to depressurize the system. Give yourself a pat on the back: your replaced filter is good to use.
How to Tell When Your Water Filter Needs Replacement
Here are some signs you should watch for that warn you about water filter issues early on:
Bad Tasting Water or Turbidity
When filters begin to fail, the problem will gradually start affecting the water, allowing you to detect the issue before it gets more serious. You can check the turbidity (how cloudy the water is) of a glass of water by flashing a light on it.
Bad water tastes include salty or metallic tastes. For example, if you use a water softener, a salty taste may imply that the system adds excess sodium to the water while trying to counteract the hard water minerals.
Odd Noises in the Faucets or Drains
This warning sign is common in reverse osmosis (RO) filters, one of the most popular filters. The drains and faucets will make some odd sounds after installing an RO filter — it’s normal. However, if the sound persists, you might need to check the installation to see if anything was incorrectly done.
Built-in Warning Signs
Some water filters have lights that come up when the filter needs a replacement or isn’t working. Familiarise yourself with how the filter works: go through the manual to know if there’s a warning sign to note. Some water filters can be examined for excess debris build-up.
Water Pressure Decreases
If the water pressure in your home fixtures drops steadily, the water filter may be totally clogged up and requires replacement. On the other hand, the water pressure decrease may be from other sources, including extensive leaking. That’s why you might need to call a professional plumber to diagnose the problem. If it’s a water filter issue, you only need to replace it. But if there’s a leak, your plumber can repair it.
How Often Should I Replace the Water Filter?
Ideally, you should replace or clean a water filter every 8 to 20 weeks. However, when you notice the water turn dark or water flow decrease, be sure to do it immediately.

Most residential filters have an electronic indicator or a cling calendar to help determine the ideal time to change your water filter.
You can check the cling calendar to know the last time you changed your water filter and when it’s due for the next change.
The electronic indicator measures the effectiveness of your filter. It will illuminate or blink when your water filter requires replacement. That cancels guesswork when changing your water filter.
Replacing your water filter will depend on the following factors:
Number of Users
This one’s obvious. The more you use the filters, the more frequently you should replace them. For example, you might need to replace it every month if you have more household members living in your home. Note that the frequency of filter replacement also depends on the particular kind of device used in your house.
Types of Filter
All water filter models have their specific recommended usage period. After that, it needs a replacement.
Filter Capacity
Filtering capacities range between 1000 to 6000 liters (265 to 1585 gallons) depending on the chosen model.
The Brand of the Filter
Ensure to go through the manual before installing the filter. Most manufacturers usually recommend the ideal replacement and cleaning service period for their products.
Number of Appliances
The number of devices that require filtering in your home also matters. For example, you might need to replace the filter more frequently if you use it in more appliances.
The Water Quality
The water quality varies depending on where you reside, which implies that the water may have different impurity levels. It helps to consider the hardness of the water. You can use the testing strips that come with some filter systems to analyze the water quality before fitting the filters.
Why Should I Change the Filter?
We all need healthy and pure water to survive. However, some regions experience tap water pollution due to the presence of heavy metals, E. coli, or other impurities, which may negatively affect one’s health after some time.
For instance, PFCs (Perfluorinated chemicals) originate from over 40 military and industrial sources from California to Maine and are potentially harmful contaminants to water supply. These manufactured chemicals make popular household products resistant to grease and water.
In 2017, data from the Northeastern University and Environmental Working Group revealed that PFCs contaminate the drinking water of over 15 million American residents.
Like several other potentially dangerous organic chemicals, including viruses, protozoa, and bacteria, PFCs can be removed from your water with water filters.
Most water filters can remove or reduce chlorine, copper, zinc, cadmium, mercury, and zinc.
There are also several reasons why you need to get a whole house water filter. Unfortunately, while many individuals understand the importance of this kind of filter, they are yet to realize the need for regular replacement.
Water filters work like the lint trays in a laundry machine. The filters collect every particle and extra gunk that shouldn’t be there.
The lint collector removed debris and extra lint, ensuring your clothes are thoroughly clean. Similarly, the water filter removes contaminants and leaves behind unpolluted and healthy water.
But as you need to change or empty the lint tray due to the grime and lint clogged, the same process applies to water filters. The substances collected from the water will begin to clog up your filter, reducing its effectiveness with each use.
Hence, regular replacement and cleaning of the filter are essential to keep it clear, clean, and functioning.
The Filter Housing Is Stuck! What Can I Do?
If the filter housing gets stuck and you have attempted to use the pressure release button and opened faucets, don’t give up yet!
Here are a few tips that may help:
- Sometimes, all you need to do is tap on your filter head.
- Blow warm air on its top with a hairdryer.
- Push it with a wrench as far as you can. Support the water filter bracket using your free hand. Then, turn your wrench in a clockwise direction (while looking down on your filter).
- If this doesn’t help, try using a tube or other extra leverage. If you use a plastic wrench that’s starting to bend, get a metal option. You may as well try two plastic wrenches simultaneously.
- If that still doesn’t help, you might need to pull out the entire filter from your water line and grip it using a vice. Then, try to open the housing by applying force.
How to Make Sure it Doesn’t Happen Again?
First, examine the O-ring and ensure it’s free of dirt and intact. If you notice any defect or cracks, change the O-ring. Then, use silicon grease (food-grade) to lubricate it. Finally, make sure its contact surface and seat in the head are clean.
Conclusion
Now you know how to change water filters. Replacing a filter is quite simple, and doing so regularly helps reduce and eliminate water-borne disease risks in your home. Isn’t life just better when we consume clean, fresh water?
For best results, replace your filters regularly. You can mark your calendar to know when the next change is due. For an efficient filter change, read the related guide above before replacing it to ensure a swift and easy process.


Pingback: Purifier Under 1000 Dollars: Top 3 - My Water Filter Choice