Reverse Osmosis Water Filter System Install: Complete Guide
Installing a reverse osmosis water filter system is one of the most effective ways to improve drinking water at home. A reverse osmosis system removes contaminants through multiple stages of filtration, leaving clean water ready for cooking and drinking.
With the right tools and a clear plan, the installation process is straightforward and manageable.
Many people choose an under-sink reverse osmosis water filter because it delivers purified water directly to a dedicated faucet without taking up much space. Others look at whole-home options or remote installs in basements or utility rooms.
Understanding how these systems work and what type best fits the space helps avoid common problems later.
This guide walks through the essentials, from how reverse osmosis works to preparing for installation, completing each step, and making sure the system runs properly.
It also covers startup testing, routine maintenance, and simple troubleshooting so the system continues to provide safe, reliable water over time.
How Reverse Osmosis Water Filter Systems Work
A reverse osmosis system purifies water by pushing it through multiple filters and a semi-permeable membrane.
This process removes dissolved solids, chemicals, and other contaminants, leaving clean drinking water stored in a tank or delivered directly through a faucet.
Reverse Osmosis Filtration Process
Reverse osmosis filtration works by applying pressure to water so it passes through a semi-permeable membrane.
The membrane has tiny pores that allow only water molecules to pass, while larger particles like salts, metals, and chemicals are flushed away.
Unlike basic filters that only trap sediment or chlorine, reverse osmosis removes a wide range of impurities, including fluoride, arsenic, nitrates, and some pharmaceuticals.
The result is purified water with fewer dissolved solids and improved taste.
The system also produces a waste stream, known as concentrate or brine, which carries away contaminants.
While this means some water is discarded, it ensures that the clean water collected is much safer for drinking and cooking.
Key Components and Their Functions
A reverse osmosis system has several parts that work together to produce filtered water:
- Sediment filter: traps sand, rust, and dirt.
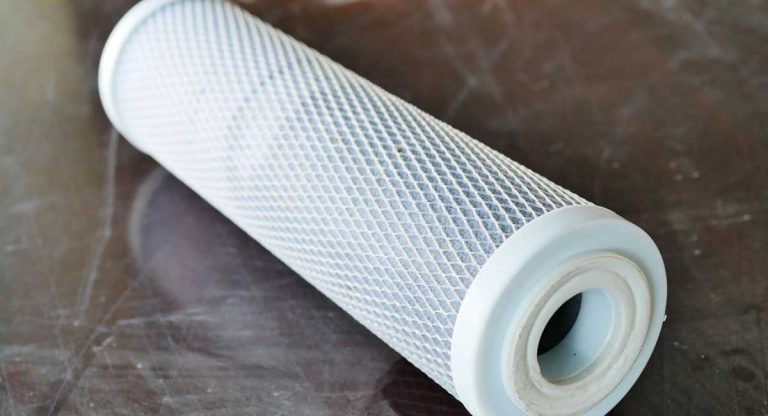
- Carbon filter: reduces chlorine, chloramine, and organic compounds.
- RO membrane: blocks dissolved salts, heavy metals, and other contaminants.
- Storage tank: holds purified water until needed.
- Post-filter: polishes water before it reaches the faucet.
Other supporting parts include a flow restrictor to control water pressure, a drain line to remove waste, and a faucet designed for dispensing purified water.
Some systems also include a remineralization cartridge to restore calcium or magnesium for better taste.
Filtration Stages Explained
Most home systems use four main filtration stages.
- Sediment Pre-Filter – removes larger particles like sand, dirt, and rust.
- Carbon Filter – adsorbs chlorine and volatile organic compounds, improving taste and smell.
- RO Membrane – the core stage that filters out dissolved solids, fluoride, arsenic, and other contaminants.
- Post-Filter – usually activated carbon, providing the final polish before drinking.
Some advanced models add extra filters, such as UV sterilizers or remineralization stages.
As explained by Water Filter Guru, these additional steps can enhance water quality depending on local water conditions.
Types of Reverse Osmosis Systems
Reverse osmosis systems are available in different formats to match specific needs.
Some are compact and designed for single faucets, while others filter water for the entire household.
Each type has unique features, installation requirements, and performance considerations.
Under-Sink Reverse Osmosis System Overview
An under-sink reverse osmosis system is the most common option for homes.
It connects directly to the cold water line beneath the kitchen sink and usually comes with a dedicated faucet for purified water.
These systems often use multiple stages of filtration, including sediment and carbon filters, followed by the RO membrane.
Many models also include a storage tank to ensure clean water is available on demand.
Tank-based systems provide faster access to water, while tankless designs save space but may take longer to deliver purified water.
Both types can also connect to refrigerators or ice makers.
Key benefits include:
- Compact design that fits under most sinks
- High-quality filtration that removes up to 99% of contaminants
- Affordable maintenance with periodic filter changes
They are a good choice for families who want clean drinking water without treating the entire household supply.
More details on installation and performance can be found in this reverse osmosis systems guide.
Countertop Reverse Osmosis System Overview
A countertop reverse osmosis system is a portable unit that sits on the counter and does not require plumbing modifications.
Instead, it either connects to a faucet adapter or works as a standalone system that users manually fill with tap water.
These systems are ideal for renters, small apartments, or anyone who cannot install permanent filtration equipment.
They use the same multi-stage process as under-sink systems but produce water in smaller batches.
Some countertop systems require electricity to pump water through the filters, while others rely on water pressure.
Their compact size makes them easy to move, and they are often more affordable upfront.
Advantages include:
- No permanent installation
- Portable and space-saving
- Good for temporary or rental housing
For a comparison of different models, see this overview of reverse osmosis system types.
Whole-House Reverse Osmosis System Overview
A whole-house reverse osmosis system connects at the main water line where water enters the home.
This setup provides purified water to every faucet, shower, and appliance.
These systems are much larger and more complex than under-sink or countertop units.
They often include pre-treatment steps such as water softeners or carbon filters to protect the RO membrane from scaling and chlorine damage.
Because they treat the entire water supply, whole-house RO systems require significant water pressure and can waste more water compared to smaller units.
They also need professional installation and ongoing maintenance.
Key details:
- Covers entire household supply
- Removes a wide range of contaminants
- Higher cost and water usage
- Best suited for well water or areas with poor water quality
For more information on how these systems work and when they are recommended, review this guide on types of reverse osmosis systems.
Preparation Before Installation
Proper setup ensures the reverse osmosis system works efficiently and lasts longer.
Water conditions, available space, and the right tools all play a role in making installation smooth and reliable.
Assessing Water Quality and Pressure
Before installing, the homeowner should test the water supply.
Water quality determines if pre-filters are needed to handle chlorine, sediment, or high mineral levels.
Poor water quality can shorten the lifespan of the RO membrane.
Water pressure is equally important.
Most systems work best between 40–100 psi.
If pressure is too low, a booster pump may be required to push water through the membrane.
If pressure is too high, a pressure regulator helps protect the unit.
Checking both water quality and pressure avoids performance issues later.
Skipping this step risks leaks, slow water output, or early filter failure.
Selecting the Right RO System
Choosing the correct system depends on household needs.
Under-sink systems are compact and provide purified water to a single faucet.
Countertop units are portable and require no permanent plumbing changes, making them suitable for renters.
Whole-house systems deliver filtered water to every tap but often need professional installation.
Capacity also matters.
A small family may only need a unit that produces 50 gallons per day, while larger households may require higher capacity.
It is also helpful to review the filter replacement schedule.
Some systems need filter changes every 6 months, while others last longer.
Selecting the right system upfront reduces maintenance problems and ensures a steady supply of clean water.
Gathering Tools and Materials
Installing a reverse osmosis system requires basic tools.
Common items include:
- Adjustable wrench
- Screwdriver
- Drill with drill bits
- Teflon tape for sealing threaded connections
- Bucket or towel to catch spills
Having all tools ready saves time and prevents interruptions during installation.
In addition to tools, the installer should lay out all RO components.
This includes the filter housings, membrane, tubing, faucet, and storage tank.
Checking for missing parts before starting avoids delays.
Safety gear like goggles should also be used when drilling or handling plumbing connections.
Preparing everything in advance makes the process more efficient.
Planning Installation Location
The most common place for an RO system is under the kitchen sink.
This location allows easy access to the cold water line and provides space for the storage tank and filters.
When choosing a spot, consider future accessibility.
Filters need regular replacement, so the system should not be installed in a cramped or blocked area.
If the system requires electricity for a pump, make sure there is a nearby outlet.
The area should also be dry and well-ventilated to prevent moisture damage.
For countertop or whole-house systems, space planning is even more important.
Adequate clearance ensures safe connections and easier maintenance.
For detailed setup guidance, homeowners can review this step-by-step installation guide that covers preparation and installation in more depth.
Step-by-Step Reverse Osmosis Water Filter System Install
A reverse osmosis filter installation requires careful setup of each component to ensure clean, reliable water.
The process involves securing connections, mounting parts in the correct order, and flushing the system to remove any debris before use.
Attention to detail during each stage helps prevent leaks and keeps the system running efficiently.
Turning Off Water Supply and Clearing Space
The first step involves shutting off the cold water supply under the sink.
This prevents accidental leaks during installation.
The valve is usually located on the wall or cabinet floor, and it should be turned clockwise until fully closed.
After the water is off, the area under the sink needs to be cleared.
Extra space ensures that the filter unit, storage tank, and tubing can fit without obstruction.
A towel or small bucket should be placed under the valve before disconnecting any lines.
This catches leftover water in the pipes.
Taking time to prepare this space avoids unnecessary mess and makes the installation smoother.
Mounting the Feed Water Adapter
The feed water adapter connects the reverse osmosis system to the cold water line.
This adapter diverts a portion of the water into the filter unit.
To install, the cold water line is disconnected from the shutoff valve.
The feed water adapter is then threaded onto the valve, with plumber’s tape applied to prevent leaks.
The supply line is reattached to the adapter’s outlet.
It is important to tighten connections firmly but not overtighten, as this can damage threads.
Once installed, the adapter provides the main water supply for the entire system.
Installing the RO Faucet
The RO faucet delivers purified water separately from the main kitchen faucet.
Many sinks already have an extra hole for a sprayer or soap dispenser that can be used.
If not, a new hole may need to be drilled.
The faucet is inserted through the hole, with a rubber gasket placed on top to prevent leaks.
A washer and nut are secured underneath the sink to hold it in place.
A small bead of silicone caulk can also be applied around the base for added sealing.
Proper mounting ensures the faucet remains stable during daily use.
Connecting the Drain Saddle
The drain saddle allows wastewater from the reverse osmosis system to exit into the sink drain. It must be installed correctly to avoid clogs or backflow.
The saddle is clamped onto the vertical section of the drainpipe, away from the garbage disposal or dishwasher line. A drilled hole in the pipe matches the saddle’s opening.
The black drain tubing from the RO unit is inserted into the saddle fitting. Tightening the clamp evenly on both sides ensures a secure hold without cracking the pipe.
Attaching the Storage Tank
The RO storage tank holds purified water until it is needed. It is usually placed on the cabinet floor near the filter unit.
Before connecting, the tank threads should be wrapped with plumber’s tape. The tank valve is then screwed onto the top opening and tightened securely.
The tank should be positioned upright and left with enough space for future maintenance. A short piece of tubing connects the tank valve to the filter system, allowing it to fill and store water.
Tubing and System Connections
The tubing connects the feed water adapter, RO faucet, drain saddle, storage tank, and filter unit. Most systems use color-coded tubing to simplify installation.
- Yellow: Feed water line from adapter to filter unit
- Blue: Clean water line to RO faucet
- Black: Wastewater line to drain saddle
- Green: Storage tank line to filter unit
Each tube should be cut to the correct length with clean, straight edges. Tubing must push fully into quick-connect fittings to prevent leaks.
Avoid sharp bends or loops that restrict water flow.
Leak Testing and Initial Flush
Once all components are connected, the cold water supply is turned back on slowly. The RO faucet is opened to release air from the system as it fills.
Every fitting and connection should be checked for leaks with a dry towel or tissue. If a drip is found, the fitting should be reseated or tightened.
The first tank of water should be drained completely to flush out carbon dust and manufacturing residue. Flushing ensures only clean water remains in the system.
Starting Up and Testing Your RO System
The first use of a reverse osmosis system requires careful setup to make sure it runs correctly. This includes flushing out any loose particles, filling and draining the storage tank, and checking that water flow meets expected performance.
Pressurizing and Flushing the System
After installation, the incoming cold water valve should be opened slowly to pressurize the RO system. This step helps identify any leaks at fittings or connections.
Users should check joints closely during the first several hours. Once pressurized, the system must be flushed to remove carbon fines and air pockets.
Opening the RO faucet allows water to trickle out, which may take several minutes. If no water appears within 10 minutes, connections and flow direction should be reviewed.
Manufacturers recommend flushing the system for at least two minutes before closing the faucet. Water should be allowed to run until only a steady trickle remains.
This ensures the filters and membrane are fully rinsed and ready for normal operation.
Filling and Draining the Storage Tank
The storage tank must be filled and emptied several times before the water is ready for drinking. Closing the RO faucet after flushing allows the tank to begin filling.
Depending on water pressure and membrane output, this process can take 3–6 hours. Once full, the faucet should be opened again to drain the entire tank.
The flow will start strong and then drop to a trickle as the tank empties. This draining step removes any remaining manufacturing residue or carbon dust.
Experts recommend repeating the fill-and-drain cycle three times. On the fourth fill, the purified water is safe for consumption.
Checking Flow Rate and Performance
After flushing and cycling the tank, the system’s performance should be tested. The faucet flow rate indicates whether the storage tank is filling and releasing water correctly.
A weak or uneven stream may suggest low air pressure in the tank or a clogged filter. It is also important to compare the system’s output with its rated production capacity.
For example, if the membrane is designed for 50 gallons per day, the tank should fill within the expected 3–6 hour window. Slow production may point to low incoming water pressure or the need for a filter change.
Some homeowners also connect their RO system to a refrigerator or ice maker. In this case, an in-line shutoff valve should remain closed until the tank has been flushed and filled completely.
This prevents unconditioned water from entering the ice maker and ensures consistent performance.
Maintenance and Troubleshooting After Installation
A reverse osmosis filtration system requires routine care to keep water clean and equipment working properly. Key tasks include replacing filters, monitoring tank pressure, and addressing common issues such as low flow or unusual taste.
Changing Filters and RO Membrane
Filters protect the RO membrane and keep water quality high. Sediment and carbon pre-filters usually need replacement every 12–24 months depending on water use.
Post-filters, which polish the water, follow the same schedule. The RO membrane lasts longer, typically 2–4 years.
Its lifespan depends on water quality and whether pre-filters are changed on time. A TDS (Total Dissolved Solids) meter helps track performance—if rejection drops below 90%, the membrane should be replaced.
Replacement steps:
- Shut off water supply and tank valve.
- Open the RO faucet to release pressure.
- Remove filter housings with a wrench.
- Insert new cartridges, checking flow direction.
- Clean housings and check O-rings.
- Reassemble, turn on water, and flush for several minutes.
Regular filter change prevents clogging and maintains consistent water flow. More details on filter schedules can be found in this RO maintenance guide.
Checking and Adjusting Tank Pressure
The storage tank in a reverse osmosis system uses air pressure to deliver water to the faucet. If pressure is too low, water flow becomes weak.
If too high, the tank may not fill properly. The correct pressure is usually 7–8 psi when empty.
To check it, shut off the water supply, drain the tank completely, and use a tire gauge on the air valve at the bottom. If pressure is below the recommended range, add air with a hand pump.
If it is too high, release air until it stabilizes. Avoid using an air compressor, as it can damage the bladder inside the tank.
Checking tank pressure once a year helps maintain steady water flow and reduces strain on the reverse osmosis filtration system.
Identifying and Fixing Common Issues
Several problems can appear after installation. Slow water production often comes from low feed water pressure, clogged filters, or an aging membrane.
A booster pump may help if household water pressure is below 40 psi.
Bad taste or odor usually indicates expired carbon filters or bacterial growth. Replacing filters and sanitizing the system once a year typically solves this.
Constant draining or noisy operation may mean a faulty shut-off valve or incorrect tubing connections. Inspect fittings for leaks and confirm all lines are properly seated.